Fuji Jobmaker Setup
If Fuji Jobmaker is installed on the Frontend then there will be a d:\jobmaker folder on the Frontend pc.
Settings
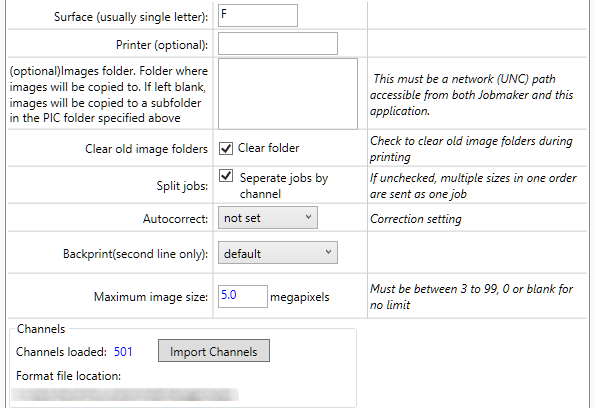
Surface:
Set the surface designation. Add other Fuji Jobmaker outputs for multiple surfaces.
Printer:
Specify the printer name for this output
Image folder:
Optional. To specify a network location to copy images. This needs to be keyed manually in the format \\server\folder.
Backprint:
Select the backprint setting to be applied for this output device
Autocorrect:
Requests the printer apply auto correction of images.
Maximum image size:
This is mainly for older models that cannot manage large image sizes: Set a value to reduce large images.
Clear old files:
Check this to delete files that may be left in the output folder over a day old.
Split jobs:
Orders containing multiple print sizes will be split into different jobs on the printer. If un-checked they will be sent as one job.
Channels:
Imports channels for easy Dakis format matching to channels
Importing Jobmaker channels
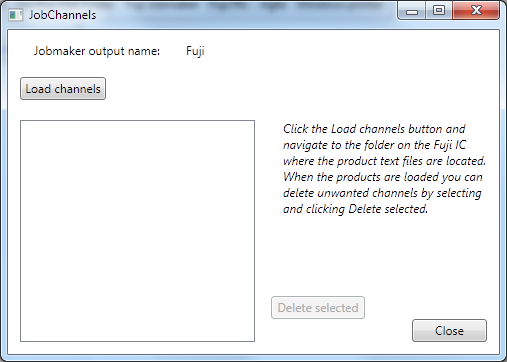
Product codes are stored in txt files on the IC in the Products folder.
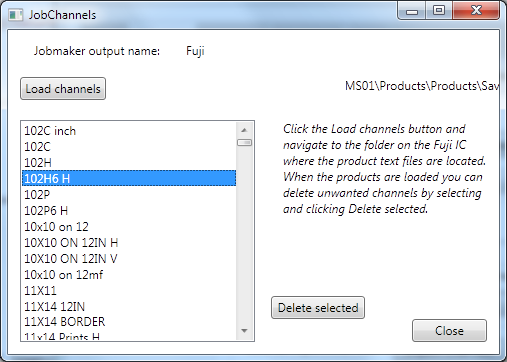
- Click Import channels on the output settings
- Click Load channels
- Navigate to the folder location on the IC where the product text files are stored.
- Remove any unwanted settings from the list