Noritsu Network Terminal Setup
The shared folder must be accessible by both the Order manager and Noritsu pc.
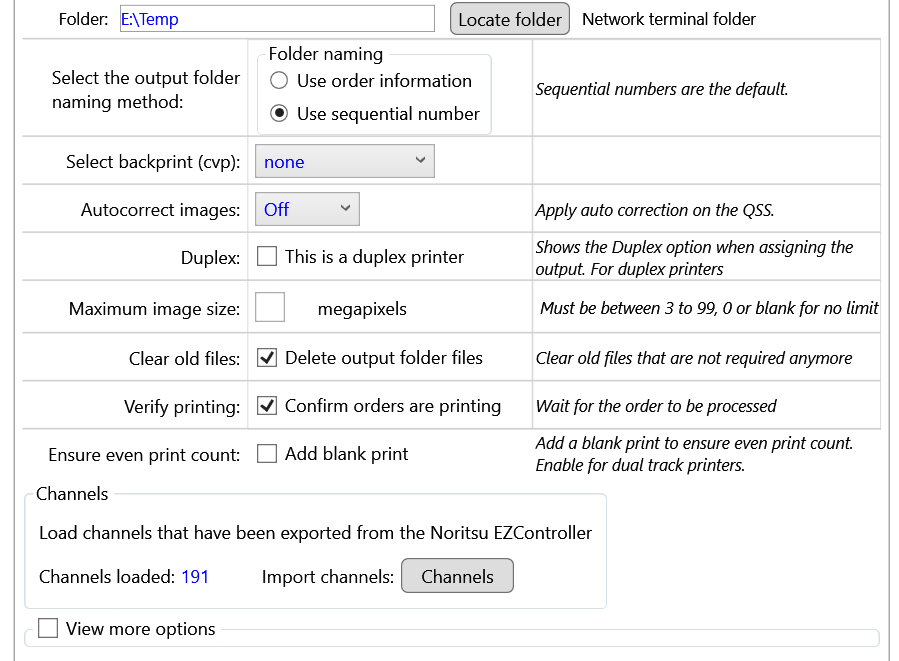
Folder naming
Sequential number is the default. Order number uses the order number data as the folder name.
Backprint
Select the backprint setting to be applied for this output device
Autocorrect
Requests the Noritsu printer apply auto correction of images. Off, On and default. Default will use the channel correction setting.
Duplex
Check if the printer is capable of duplex printing.
Maximum image size
This is mainly for older models that cannot manage large image sizes: Set a value to reduce large images.
Clear old files
Check this to delete files that may be left in the output folder over a day old.
Verify printing
Check to wait for the printer to process the order and verify it is accepted ok.
Add blank print
Only for Noritsu dual roll printers. Ensures even print count by adding a blank print.
Channels
Imports channels for easy Dakis format matching to channels
Options: Order Sort print
If set, adds an id print to seperate print runs. It shows the order details. This can be set to print at the start or end of the order.
Options: Perfectly Clear Quickserver
Instead of sending directly to the printer, it flags Perfectly Clear Quickserver to process the images, then Quickserver sends the order to the printer.
Noritsu: Setting Network terminal setting
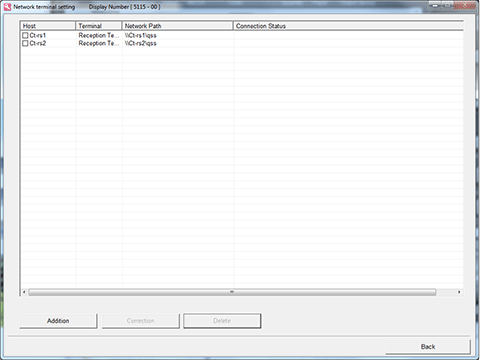
- Click Addition button.
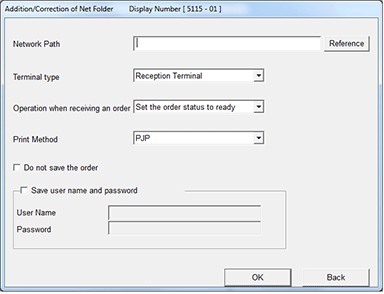
- Addition/Correction of Net Folder.
- Set Network Path to the path specified in IPS Order Manager
- Set Terminal type, Operation and Print Method.
- Click OK and check Connection Status to verify communication.
Noritsu: Setup on EZController
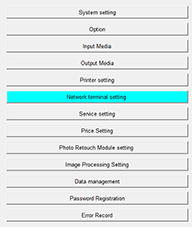
On the EZController Main Display click F - Management Tool - System management - Network terminal setting
-
Click F to open settings. Select System managemant and then Select Network Terminal setting
-
Click Addition button.
-
Click Reference to browse to the shared folder where Order Manager places the files.
Select the other settings as desired.
Noritsu: Importing Channels
Procedure to export print channels from the Noritsu EZ Controller.
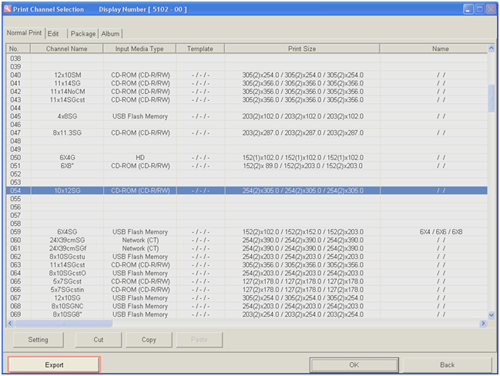
- On the Noritsu EZ Controller, Access the Print Channel setup menu
- Click the Export button at the bottom of the channel list.
- Record where the channel export file is located.
There will be a number of files: ch_data.csv contains all the channel data. The other files contain subsets.
Procedure to import print channels exported from the Noritsu EZ Controller.
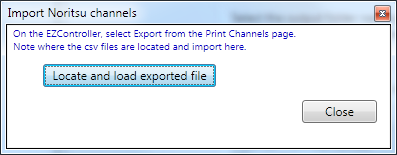
- In IPS Order Manager click the Settings menu.
- Select the Noritsu minilab
- Click Import channels.
- Navigate to the export folder and select ch_data.csv.
- Click Open.
- The file import will complete.